Saturday, 14 May 2011

Some Old Tarts

Maple Bacon Pop Tarts
Pizza Time Pop Tart 

ANOTHER JUNK FOOD BECOMES HIP AND HEALTHY 
or
 THE POP TART WE LOVE SO MUCH

So me and Michelle get these cravings for junk food from back home every once in a while here in the Bloody Ole. Michelle is a fan of the Smitten Kitchen website (cant hate, its great) and flipped out when she saw their homemade version of Pop Tarts. Upon seeing it myself I was craving the original junkie, awful-for-your-health original. But I had yet to find anywhere in London that sold Pop Tarts (until about a week ago). (Updated: A friend of mine has let me know that Pop Tarts were in fact sold in UK supermarkets but that now she doesnt see them anymore.)

But why would I crave so hard for such junkie food stuffs? Most likely it has to do with the fact that I was raised by an alternative leaning health-food crazied mother who spent a good portion of her life munching on veggie burritos and granola in the parking lots at Grateful Dead shows across the USA. So I ate Kashi instead of anything close to Fruit Loops or Coco Puffs, and was only allowed Soy Milk. I hated Soy milk, still do kind of. Pop Tarts were only available to me after sleeping over at certain friends' houses as a youngster. My mother would have snatched them from me if she ever saw me eating one. Back then McDonalds was a real treat as well. Hell... actual milk was a rarity! I drank more kambucha as a kid than most college students do in their 4 year terms. 

Another factor leading towards us making some filled pastry item is undoubtably our daily experiences or non-experiences with British cuisine which almost revolves around baked and filled/stuffed goods. Plus we had just gotten back from a beautiful weekend in Cornwall and had had our first encounters with Cornish Pasties. Those Pasties blew us away in a... umm... undesirable way. Eating something that doughy, greasy, and meat chocked whilst riding around curving country roads underneath the omnipotent English sun made for a wholesomely queasy experience. Im sure Cornish Pasties are amazing if you eat one after some hard outdoor manual labor. Our British hosts handled their Pasties a-ok. On a tourist American stomach they wreck havoc apparently. 

Alas, seeing homemade Pop Tarts triggered a longing for the secret hide-from-yer-mom treat of my youth. That lead to other sloppy American food items I miss, like pancakes and bacon with maple syrup. Being bored at the time lead to me and Michelle spending the greater portion of our evening concocting these versions of Smitten's tarts.
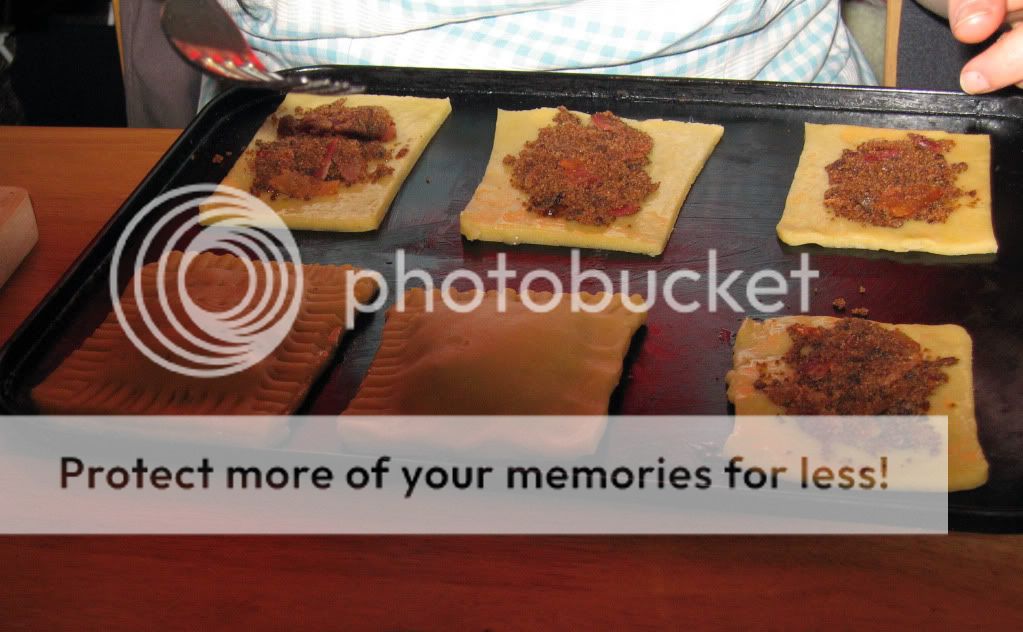


Home made Pop Tarts
(makes 9 - 3x5inch)
(dough recipe adapted from Smitten Kitchen)


Dough
2 cups (8 1/2 ounces) all-purpose flour
1 tablespoon sugar
1 teaspoon salt
1 cup (2 sticks or 8 ounces) unsalted butter, cut into pats
1 large egg
2 tablespoons (1 ounce) milk


1 additional large egg (to brush on pastry)


Maple Bacon Version:


Filling

6 crispy cooked bacon slices - finely chopped
1/2 cup (3 3/4 ounces) brown sugar
1/2 teaspoons ground cinnamon, to taste
1 teaspoon maple syrup
4 teaspoons all-purpose flour


Glaze

2 tablespoons maple syrup
1 cup powdered sugar
1 tablespoon milk (more if needed to achieve the right consistency)


Pizza Time Version:


Filling

1 cup of leftover Tomato sauce for spaghetti
1 ball fresh mozzarella (torn into strips)
Basil leaf for each tart

grated parmesan for dusting tops of tarts


Make the dough: Whisk together the flour, sugar, and salt. Work in the butter with your fingers, pastry blender or food processor until pea-sized lumps of butter are still visible, and the mixture holds together when you squeeze it. If you’ve used a food processor, transfer the mixture to a large bowl. Whisk the first egg and milk together and stir them into the dough, mixing just until everything is cohesive, kneading briefly on a well-floured counter if necessary.


Divide the dough in half (approximately 8 1/4 ounces each), shape each half into a smooth rectangle, about 3×5 inches. You can roll this out immediately (see Warm Kitchen note below) or wrap each half in plastic and refrigerate for up to 2 days.


Assemble the tarts: If the dough has been chilled, remove it from the refrigerator and allow it to soften and become workable, about 15 to 30 minutes. Place one piece on a lightly floured work surface, and roll it into a rectangle about 1/8″ thick, large enough that you can trim it to an even 9″ x 12″. [You can use a 9" x 13" pan, laid on top, as guidance.] Repeat with the second piece of dough. Set trimmings aside. Cut each piece of dough into thirds – you’ll form nine 3″ x 4″ rectangles.


Beat the additional egg and brush it over the entire surface of the first dough. This will be the “inside” of the tart; the egg is to help glue the lid on.


Assemble the Maple Bacon filling by mixing all ingredients together until well incorporated. Place a heaping tablespoon of Maple Bacon filling into the center of each rectangle, keeping a bare 1/2-inch perimeter around it. For Pizza Time Tarts place one small spoonful of your tomato sauce down on the dough, then top with piece of mozzarella (dont use too much or the filling will be too big for the tart to hold together), then one leaf of basil.


Place a second rectangle of dough atop the first, using your fingertips to press firmly around the pocket of filling, sealing the dough well on all sides. Press the tines of a fork all around the edge of the rectangle. Repeat with remaining tarts.


Gently place the tarts on a lightly greased or parchment-lined baking sheet. Prick the top of each tart multiple times with a fork; you want to make sure steam can escape, or the tarts will become billowy pillows rather than flat toaster pastries. Refrigerate the tarts (they don’t need to be covered) for 30 minutes, while you preheat your oven to 350°F.


Remove tarts from fridge. Sprinkle your Pizza Time Tarts with grated Parmesan before baking (350°F or 175c). Bake for 20 - 25 minutes or until golden brown.


Glaze for Maple Bacon Tarts:

Sift the powdered sugar into a bowl. Add maple syrup and slowly mix to incorporate. Add the tablespoon of milk and mix until smooth. Add more milk if needed. You want the consistency to be thin enough to pour but not so runny that it won't stay on top of the tarts.

Once the tarts are cooled, spoon the glaze over each one and let sit for 30min until it had set. Enjoy at room temp or gently reheat in the oven.

Saturday, 30 April 2011

Cupboard Shots

MARCH 12th 2011 
Ingredients (clockwise from top left) 
Avocado Leaves
Koeze Cream Nut Peanut Butter
Flamin Hot Cheetohs
Biona Coconut Oil
Bim's Kitchen BBQ Sauce sampler
Mexican Oregano
Saffron Rock Sugar Sticks (for tea)
Jar of Sumac
Hoja Santa Leaves
Venere Nero Risotto
Pistachios
London Bee HoneyComb
(bottom shelf - starting from right)  
San Marcos Chipotles en Adobo (behind: Nopales rajas canned)
Carey Tinned Tomatillos
Honey with nuts
De La Rosa Mazapan de Cacahuate (peanut marzapan candy)
Grey Poupon Whole Grain Mustard
Mc Vittles Rich Tea Biscuits
Harrods Scottish Honey
some Mexican chocolate in the back
Tinned chickpeas
Rowse honey
Dried Mangos
Package of Nairns Oat Cakes
Nam Jai Palm Sugar
Bulgar, fine grain
Rose Petal Jam
Faella Spaghetti
Martelli Spaghetti

--------------


APRIL 21st 2011 
Ingredients (clockwise from top left) 
Duck Gizzards
Duck Confit
Fois Gras
Koeze Cream Nut Peanut Butter
Cascabel Chiles
Empire Made Peanut Pate
Biona Coconut Oil
Hoja Santa Leaves
Avocado Leaves
London Bee Honeycomb
(bottom shelf from right) 
San Marzano tinned Tomatoes
Pecans
Harrods Scottish Honey
Whole Foods Refried Pinto Beans
Carey tinned Tomatillos
Brindisa Tortilla de aciete olivo w/anise seed
Carey rajas de poblano
Frijoles Charros
TRS Rose Water
Dittys Oat Cakes
Cajeta dolce
Jar of Sumac
Nairns Oat Cakes
Pine Nuts
Palm Sugar
Mexican Tamarind candy
Rose Petal Jam
M&S Rich Tea Biscuits
San Marcos Chipotles en Adobo
Faella Spaghetti
------------


...send me a shot of yours? no arranging!

CHAI

I prefer tea over coffee. Guess thats not a bad thing when you find yourself living in the UK. I was a little let down expecting to find loads of Chai being served up all over London dude to the large Indian community. Besides one experience in Southall (a particularly large and concentrated Hindu community on the western edge of London) I still find that my homemade Chai is still the most satisfying. Perhaps thats how its meant to be though....

CHAI
Ingredients 
-about 20 green cardamom pods
-1 black cardamom pod
-about 1/2 inch of canela cinnamon (use whatever whole cinnamon you have, i just prefer mexican canela)
-10 black peppercorns
-2 cloves
- 1 cup or 1 and a half cups milk (whole milk is tastiest obviously but suit yourself)
- 4 bags of assam black tea (dont waste money on a super fancy grade here)
- sugar (optional I guess... but its always sweetened in India I hear...)

Method 
Using a mortar and pestle, smash up the green and black cardamom until the pods break and the seeds escape. Put the milk in a small pot over medium heat. Add all the listed spices and the broken up cardamom. Cook milk and spice mixture until slightly reduced and be sure to stir occasionally.
Meanwhile brew the tea. I prefer really strong Chai, so I use 4 bags of tea brewed (for about 3 mins) in 3 1/2 cups of boiling water.
Strain the tea bags and remove from tea. Combine the milk and tea into a vessel (most likely a tea pot but  whatever - sometimes I add the tea to the milk in the pot). Add sugar to taste, pour through a strainer into cups (to catch whole spices and pieces) and serve.

I also like not straining it and just having a couple bits of spice floating about in my cup but I guess im dirty like that.

Tuesday, 19 April 2011

Thursday, 31 March 2011

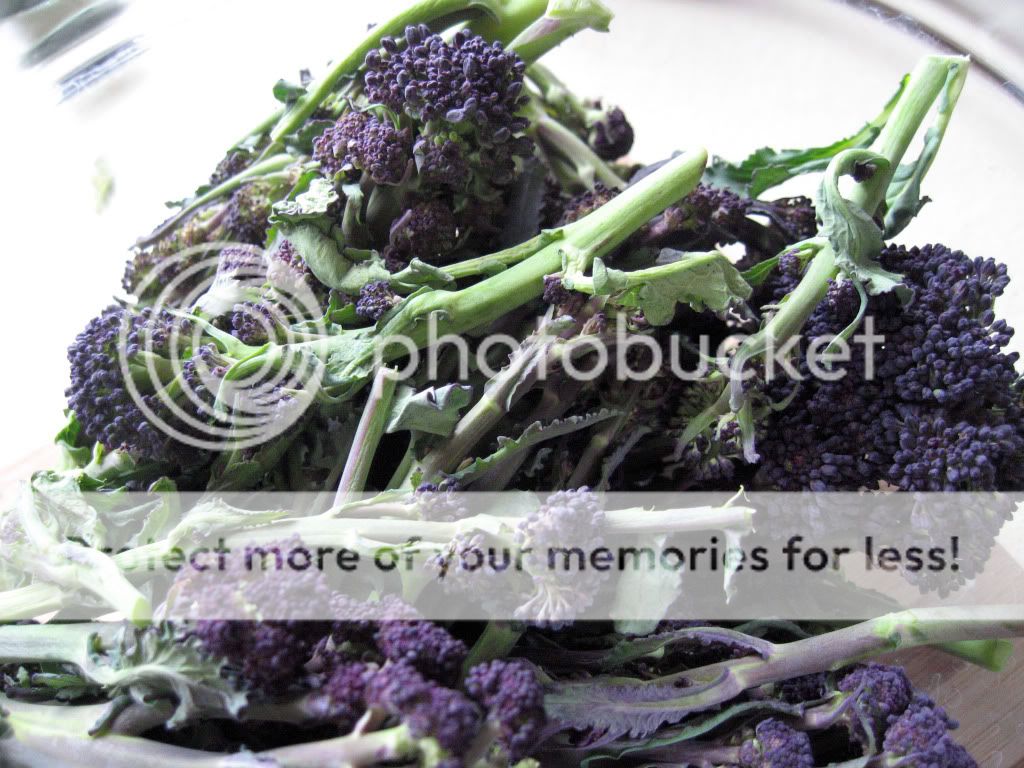
Purple Broccoli

stems
leaves 

The early parts of March can be sort of a drag here weather-wise in London; very grey, fluxoating between dry and wet, mild warmth and lingering cold. Thats why I try to remember that at this same time of year something very colorful is coming. Right around the middle of March purple broccoli is breaking through the dull tones of the haze catching the eyes and beckoning the tongue, pan, knife and fork. 
Heres what you might want to do when this happens: 

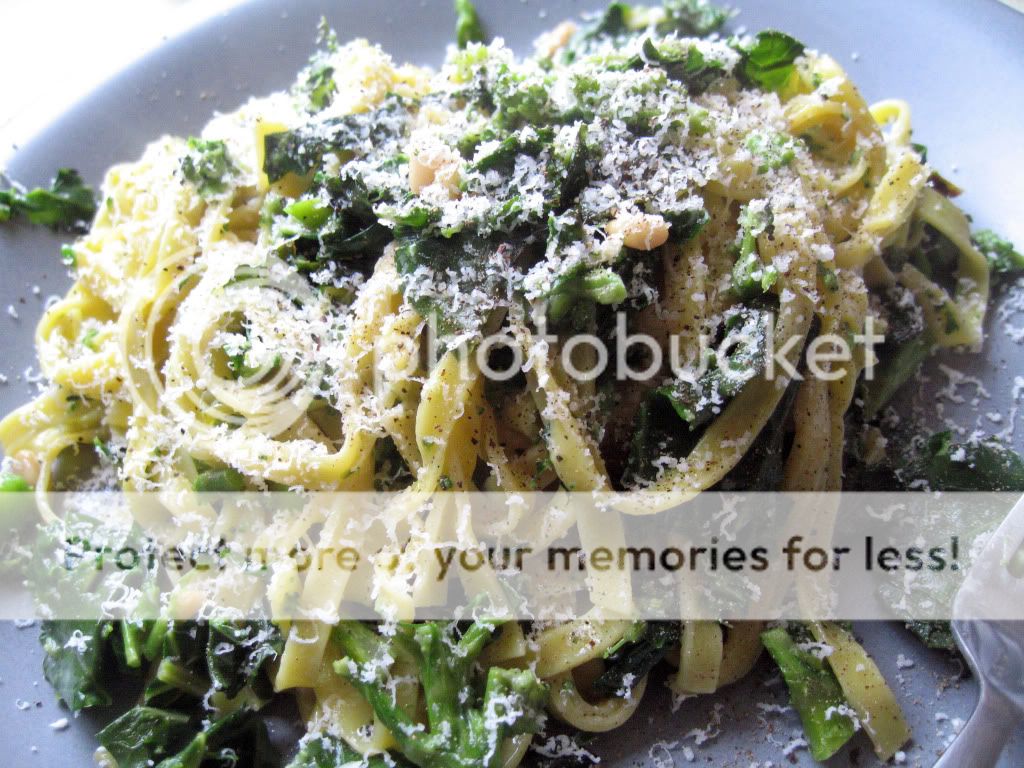
TAGLIATELLE WITH PURPLE BROCCOLI 


serves 2 

Ingredients 
-1 large head of Purple Sprouting Broccoli (Americans - you might not be able to find this anywhere but my bet is that you should check the local farmers markets or possibly a fancy organic store - if nothing you can substitute broccoli rabe to similar effect)
-250 g of fresh tagliatelle or taglialette or you could get away with papardelle or fettucini 
-3 tbsp unsalted butter 
-1/3 cup pine nuts - roasted or toasted in dry skillet 
-1/2 tsp fresh ground black pepper 
-2 cloves garlic - crushed into a paste 

-1 or 2 tbsp heavy cream depending on your cream love ("whipping cream" if your stateside) 
-fresh grated Parmesan for serving 

Method
Begin by setting a large pot for boiling pasta and broccoli over high heat. Chop the tough bottom part off of the broccoli head. Then chop the whole head of broccoli into pieces no bigger than an inch (leaves and all - its all good). 

Once the water boils salt it well and then add in the pasta and gently stir. Add in the chopped broccoli about 2 mins after you add in the pasta. You just want to soften the broccoli not cook the life out of it, so if your pasta requires a long cooking time then wait a bit longer before adding in the broccoli. The broccoli should really only boil for about 4 minutes - until it is slightly firm to the touch and easy to eat. 

Reserve at least 1/4 cup of pasta water then drain pasta and broccoli and set aside. 

Place a frying pan over medium heat and add the butter. Once it starts to foam up a bit add the pine nuts and ground pepper. Just as the butter is beginning to brown (after about 5 mins) add in the garlic paste. Cook an additional minute then remove from heat. (This step can be done while pasta and broccoli cooks if your up for it.) 

Return pasta and broccoli to large pot, add in the reserved pasta water, the brown butter and pine nuts, and the heavy cream. Toss to incorporate ingredients, check if salt is needed, then serve with the grated parmesan. 


Wednesday, 9 February 2011

CHAMPURRADO


Its not the prettiest sight for the weary morning eye. But once you taste you realize that its good to have more than one sense. This Mexican breakfast delight is best served on sunny mornings (it looks much better well lit). 

CHAMPURRADO 
(Mexican Chocolate Breakfast Porridge) 
(serves 2) 
Ingredients: 
-1/2 disc of Ibarra brand Mexican Chocolate or about 40 grams of any other drinking milk chocolate
-1/4 cup of Masa Harina (corn flour for tortillas)  dissolved in 1/8 cup of hot water
  - - - - (if you cant find Masa then try substituting Semolina and let me know how it works)
-3/4 cup hot water 
-1 cup of whole milk 
-1 tbsp of molasses or black treacle 
-2 1/2 tbsp brown sugar (dark or light to your taste!) 
- 1/4 - 1/2 tsp of chile flakes (or none if you dont like spice) 
-1 inch long cinnamon stick, preferably Mexican cinnamon... 

  -----NOTE: if you dont use a Mexican chocolate you might want to add a touch of vanilla extract and maybe just a bit more cinnamon to get the flavor closer to the Mexican chocolate which contains a bit of both in it (innit). 

Method: 
Start by grinding the Ibarra chocolate in a mortar and pestle until a rough powder is produced (skip step if using drinking chocolate powder). Next put dissolved masa harina and the hot water into a blender/processor and blend until smooth. Pour the blended masa into a small and deep sauce pan over medium low heat. Begin stirring mixture with a whisk and proceed to add in all the other ingredients. Bring to a low simmer and cook until mixture thickens to a thick smooth custard consistancy and becomes glossy. DO NOT BOIL! 

At this point you are ready to go. Check the seasoning (add more brown sugar if needed, more chile if needed) and serve. Some people might tell you to strain it but I dont see the point. If cooked right it will be smooth in the mouth and straining is unessesary. Do pick the cinnamon stick out if you feel. 


Tuesday, 1 February 2011

Quick Cheap Easy Dinner...

for Joel W 
 Anytime someone says "quick" combined with "cheap" and "easy" this is the first thing to come to mind: "Pasta" 
The cheapest one I know... that would have to be this one: 

Pasta alle Acciughe i Broccoli 
serves 2


Ingrediente
-250 g Spaghetti or if preferred Penne or whatever.... I think spaghetti works best
-2 small heads of broccoli or 1 big one (smaller tend to be more flavorful)
-1 tin or small jar of anchovies in oil (not in salt)
-1 dried red chilli or 1/2 tsp of chilli flakes
-freshly ground black pepper
-chopped parsley (optional)
-1 tbsp nice extra virgin olive oil

Method: 
Fill up a large pot of water for boiling your pasta and place over medium high heat. Next trim the bottom of the brocolli stems and chop the whole head of brocolli (dont waste the stem, its a great part of the vegetable!) very finely just like this:
Set aside.

Dump anchovies along with their oil into a small skillet and heat over medium heat. Stir well with a wooden spoon and continue to cook. Once the anchovies begin to dissolve into the oil add in dried chilli/chilli flakes and a good amount of fresh ground black pepper. Cook another 1 minute and then turn heat all the way to low just to keep the oil warm.

 When the water boils add in 1/2 tsp of salt and then your pasta. After about 7 mins (or more precisely: 2 minutes before the end of suggested cooking time of your pasta) add in the broccoli and stir. Cook until pasta is al dente and then drain the pot RESERVING 1/4 CUP OF PASTA WATER!

Put pasta and broccoli back into the pot and add anchovy sauce and some reserved pasta water. Toss pasta well and adjust seasoning. Add extra virgin olive oil and parsley (if using) and toss again.

Now serve... with a simple salad perhaps?


-
C Powers